The classic joke in SharePoint is that the debate over folder vs. metadata never ends and will probably never end. Some users prefer metadata, while others are stuck with good-old folders. However, there is one type of functionality that allows the flexibility of both. Today, I want to introduce you to the functionality of Document Sets, the magic feature that allows you to store documents in folders, yet, assign metadata if you wish.
WHAT IS A DOCUMENT SET?
Document Set is a special Content Type. In the past, I have written a few blog posts on content types and how to use them. Check out this post to learn more about what the Content Type is this one about how to use them with documents and document libraries.
To explain in basic terms, Document Set is a folder with metadata. And I am not joking when I say it is a folder. As I will later demonstrate, when you create a document set in SharePoint, behind the scenes you create a regular “yellow” folder. Except, this folder can have metadata assigned to it. And the documents you put inside of that folder can also have metadata assigned to them. Awesome!
WHAT MAKES DOCUMENT SETS SPECIAL?
In addition to being able to have metadata combined with folders, document sets have these special and unique features that make them standout from other document management methods.
Welcome Page
Each Document Set gets its own page that displays folder-level metadata and allows to access the files inside of the folder (document set)
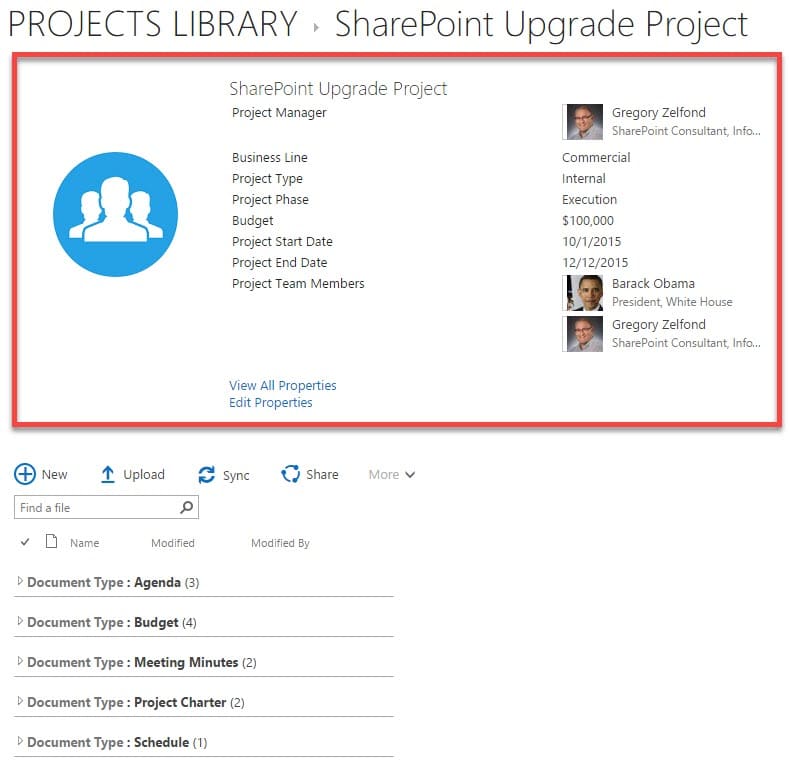
Ability to inherit metadata
You can set the Document Set such that any files uploaded to the Document Set (folder) will inherit the metadata from that folder.
Unique permission for each document set
You can also assign unique permission to each document set. You can do the same with regular folders, but the user experience is much better with document sets.

Ability to search across the document sets
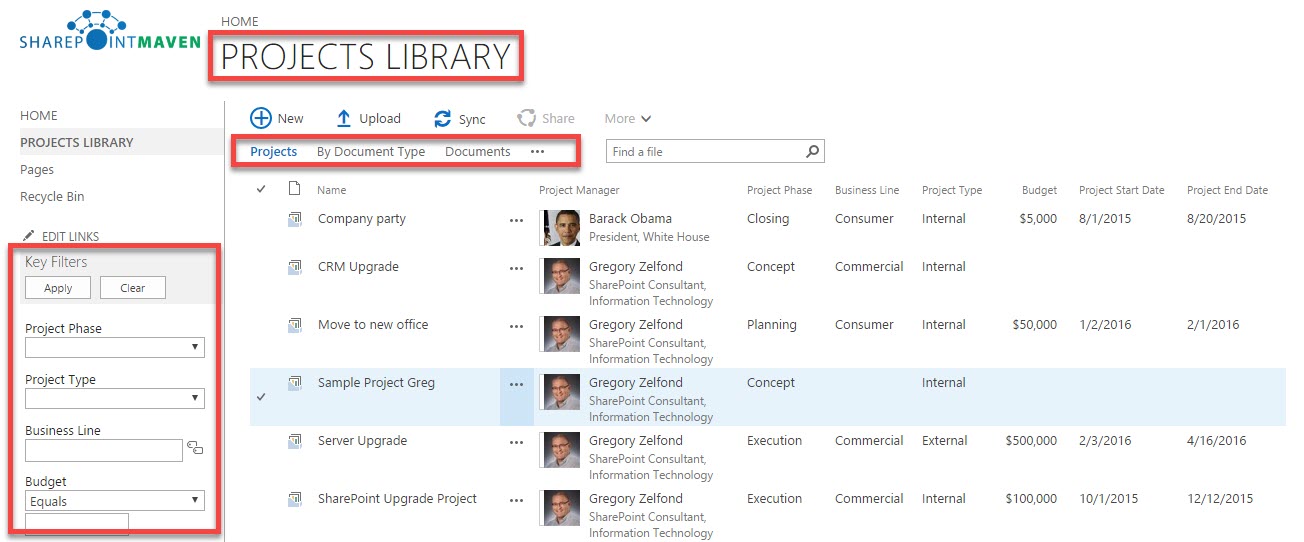
All the document sets (folders) you create reside in a single library. That means that you can easily search across document sets since you will essentially be searching in a single document library (unlike searching across multiple sites, which is a bit tricky).
HOW TO SET UP A DOCUMENT SET
Let’s go ahead and create a document set. For this example, we will create document sets to store our projects (project documents).
Step 1: Enable Document Sets
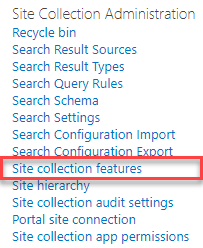
By default, the document set content type is not enabled. It is a Site Collection feature and must be manually activated before you can proceed and start creating it. To do this:
-
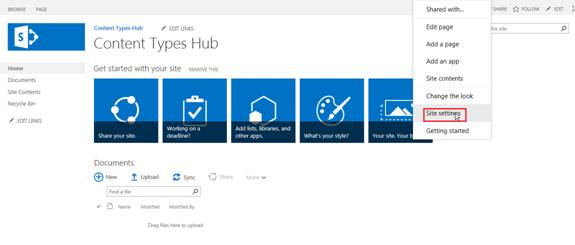
Click Gear Icon > Site Settings (in Modern Pages/Sites, click Gear Icon > Site Information > View all site settings)
-
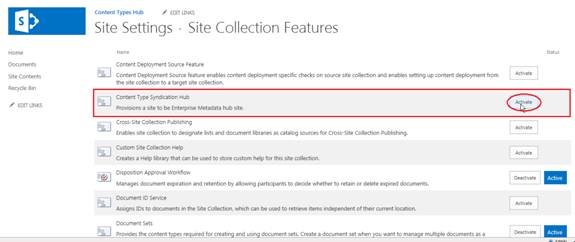
Under the Site Collection Administration section, click on Site collection features
-
Scroll until Document Sets row and click Activate. Your document set content type is now activated, and you can proceed to the next step!

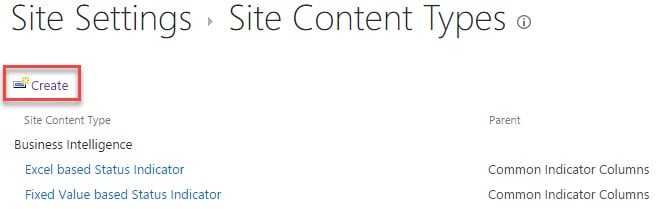
Step 2: Create a Document Set Content Type
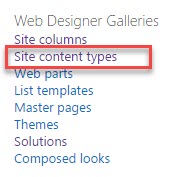
Since Document Set is a special content type, first you need to create a content type – you do that at the Site level.
-
Click the Gear Icon > Site Settings
-
Under Web Designer Galleries, choose Site content types
-
Click Create link
-
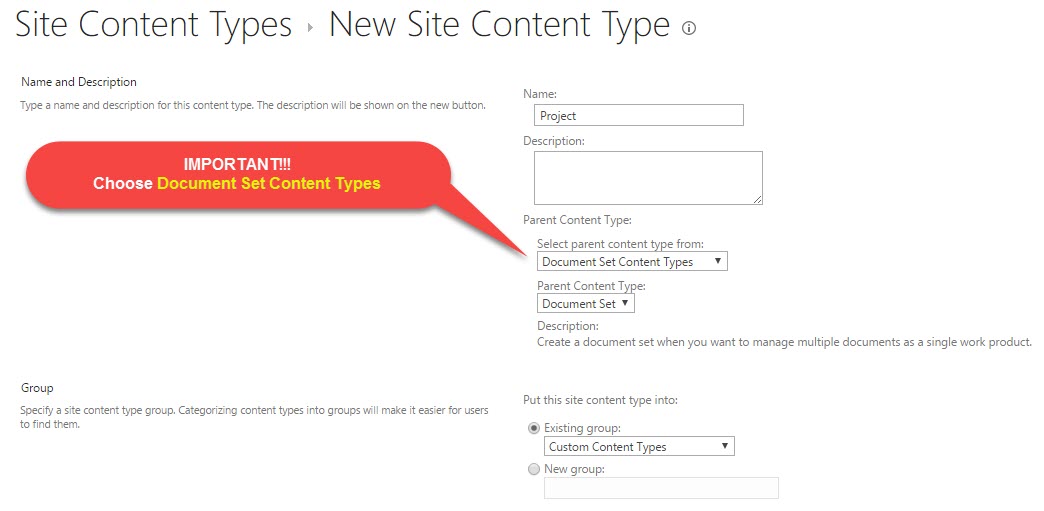
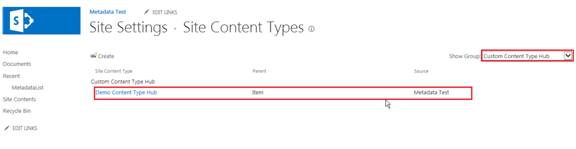
On the next screen give your Document Set a name (i.e. Project), then from the Parent Content Type drop-down choose Document Set Content Types, then Document Set from the drop-down below. At the bottom of the screen, choose the group for your new content type (you can leave it in the Custom Content Types group or can create a new one).
-
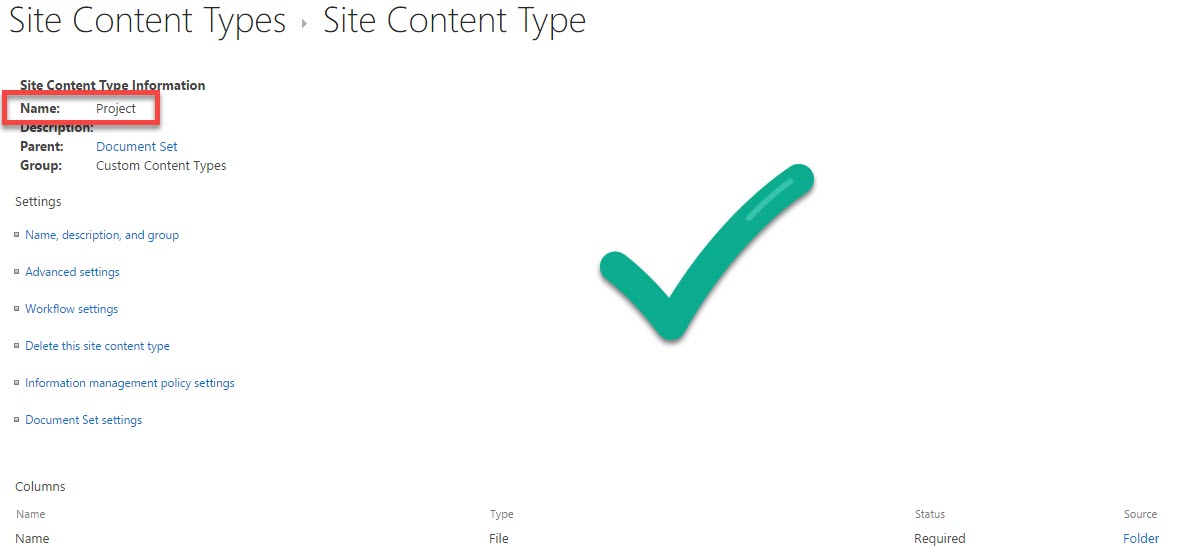
Your custom Document Set Content Type is created! (but we are not done yet)
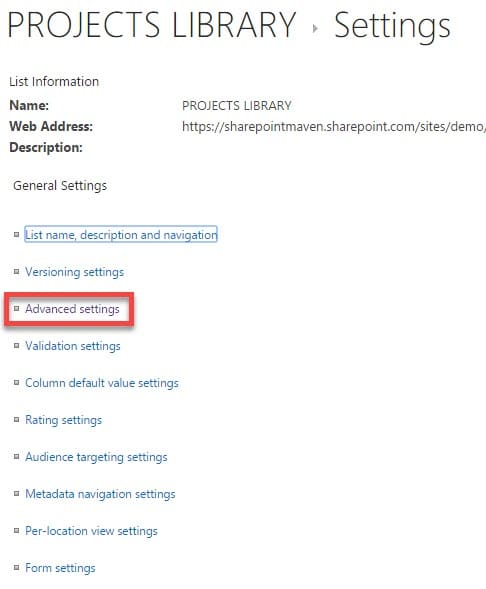
Step 3: Add content type to the document library
In this step, we are going to be adding our custom content type to the library.
-
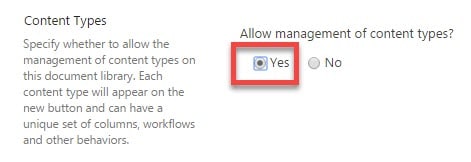
First, we need to enable multiple content types for a document library. In the document library where you want to add document set to, click on Library Settings > Advanced Settings
-
Under Allow management of content types?, choose Yes. This will allow us to add custom content types. Click OK at the bottom of the screen.
-
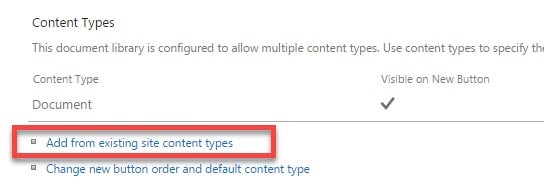
In the Content Types section that appears as a result of the previous step, click Add from existing site content types
-
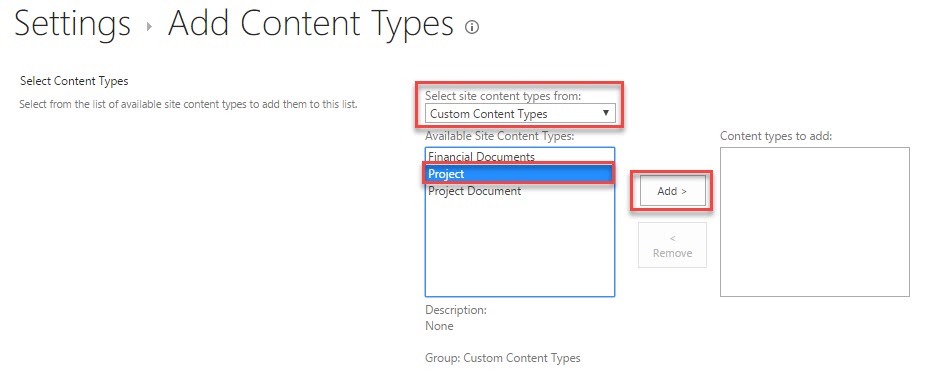
On the next screen, select the group where you filed your custom content type in (Custom Content Types in my case), then choose the name of the content type you created in Step 1 and click Add Button. Once the content type appears in the right panel, click OK.
-
Your custom content type is now added to the library. By the way, you might also want to remove the default “Document” Content Type that was there originally. To do that, just click on the Document and click Delete this content type

Step 4: Create metadata columns
I won’t go into detailed instructions here on how to create library level metadata columns. Since I have extensively covered this previously, please reference this post for step-by-step instructions.
Step 5: Add metadata to the content Type
You could actually do this step right after Step 1, depending on where and how you want to maintain your content type metadata (site level or library level). In this example, I am creating and maintaining my metadata at the library level.
-
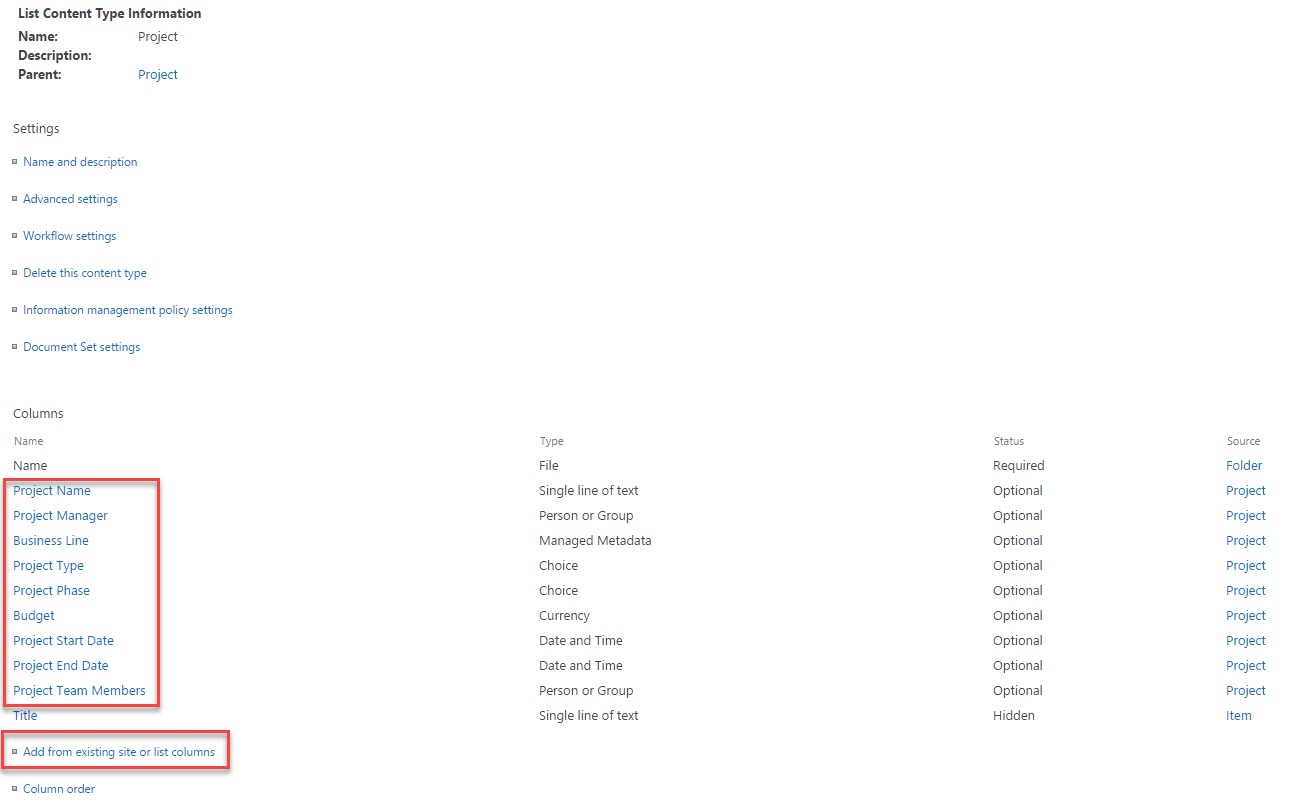
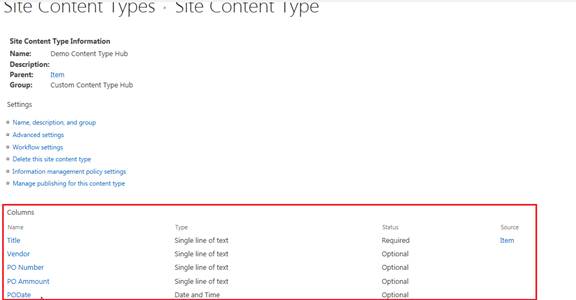
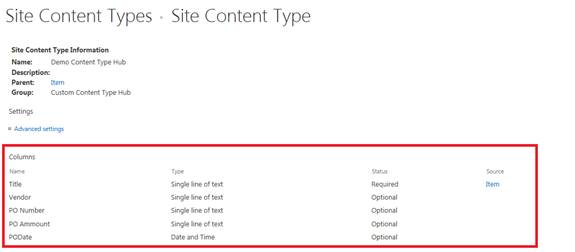
Click on the Document Set content type from within the library settings, and you will see a screen that looks like this
-
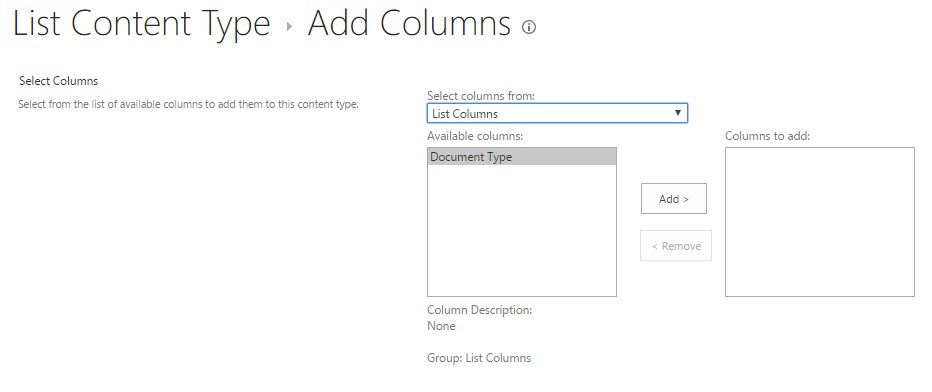
Click on Add from existing site or list columns and add all the list or site columns you want to associate with your document set (folder). This step is very similar to the one above where we added content type from the list of available content types. Click OK.
Step 6: Configure Document Set
This is the exciting part. Now that we have our document set and columns associated, all that remains is the configuration of the Document Set look and feel and behavior.
-
Click on the document set, then Document Set settings

-
In the Allowed Content Type section, choose the content types that you want to allow within the document set. By default, Document content type will be listed there. However, you can also create and add your own custom content types, with its own metadata, just like I did in the example below.

-
The Default Content section allows you to embed certain file templates into each new document set created. You can skip this section if you don’t have any templates to embed.

-
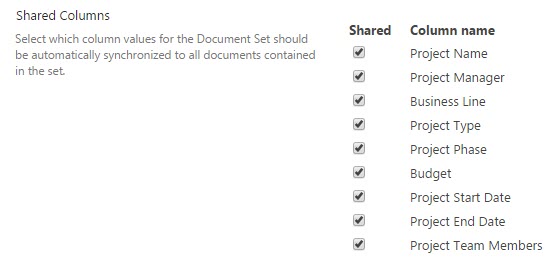
In the Shared Columns section, you can specify which folder-level columns (metadata) will propagate through to the files uploaded into the document set. So if you want your documents to inherit some or all metadata from the folder, just check off the boxes next to columns.
-
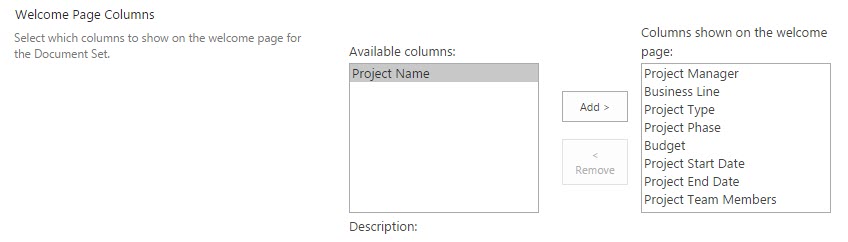
In the Welcome Page Columns section, you can choose the columns that will appear on the Welcome page of each document set.
-
In the Welcome Page View, you can specify which view will appear as the default view for documents in the Document Set. While you can create many different views to organize documents, you can’t easily switch between them within the Document Set. So you have to provide only one here that will be the only way to view documents.

-
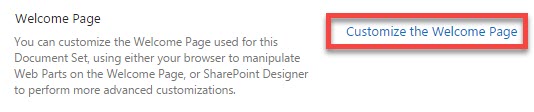
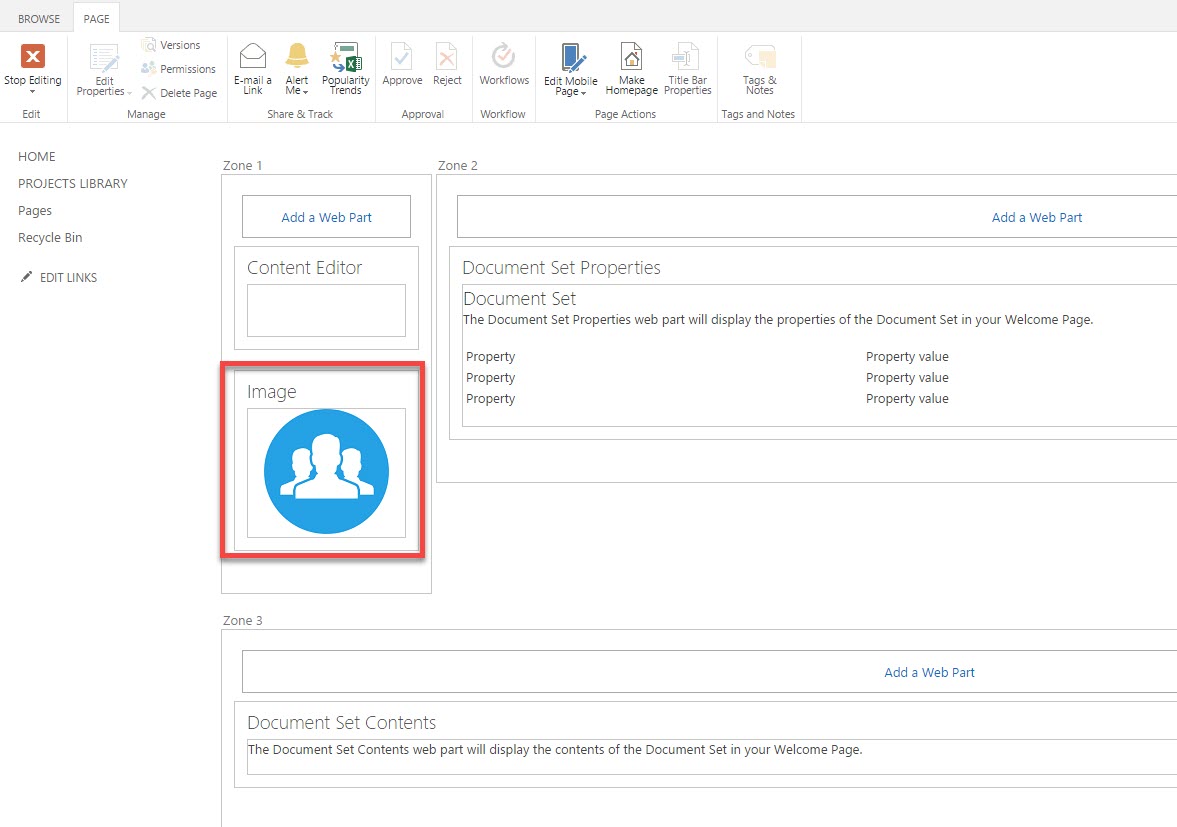
In the Welcome page section, you can actually customize the look and feel of Welcome Page. To do so, click on Customize the Welcome Page
-
Then, on the next screen click Page Edit and you can make some adjustments to the look and feel of the page. For example, one thing you can do is replace the default document set graphics with the image/icon to depict your document set, like in the example below.
That’s all!
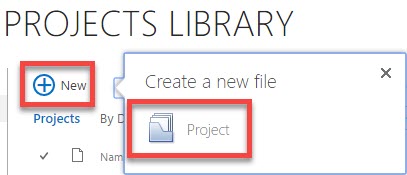
HOW TO CREATE A NEW DOCUMENT SET
-
Click New from the Document Library main page, then choose the document set (you will probably have one type, but you can have multiple content types to choose from)
-
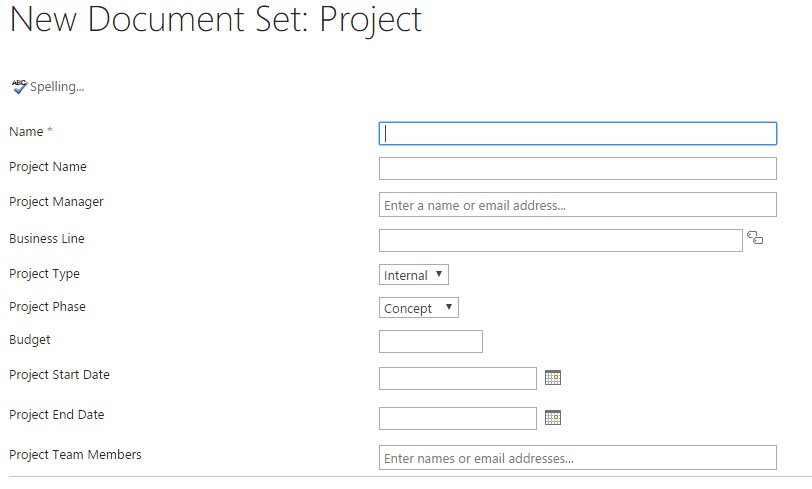
On the next screen, just fill in the blanks (all the folder level metadata you created in previous steps). Click OK
-
Your Document Set (Welcome Page) will now be created. You can now go ahead and upload documents.
HOW TO UPLOAD DOCUMENTS TO THE DOCUMENT SET
Same way as into “regular folder.” You can either use the Upload button or just drag and drop documents into the document set.
DOCUMENT SET LIMITATIONS
It is all about documents
It is a limitation by default. But If you are thinking of using document sets to manage small projects, all you have on a welcome page is a document set. While you can add other web parts to the welcome page, they will be common to all document sets (in other words, you cannot have each welcome page contain its own task list or calendar for example).
Document Library can get really large
Say you configured a document library to house client data and are using document sets for it. With time, this library might get really large, impacting performance and ability to find stuff.
Metadata sync
If you decide to sync the document library with document sets to your desktop (link) – you will lose the metadata when you try to access the files on your PC. Metadata will stay in SharePoint, but will not get copied onto your computer.
BEST USE CASES FOR DOCUMENT SETS
The following are usually best applications for document sets:
...


 Upload Documents inside document set in Library")
 upload files inside document set in Library")


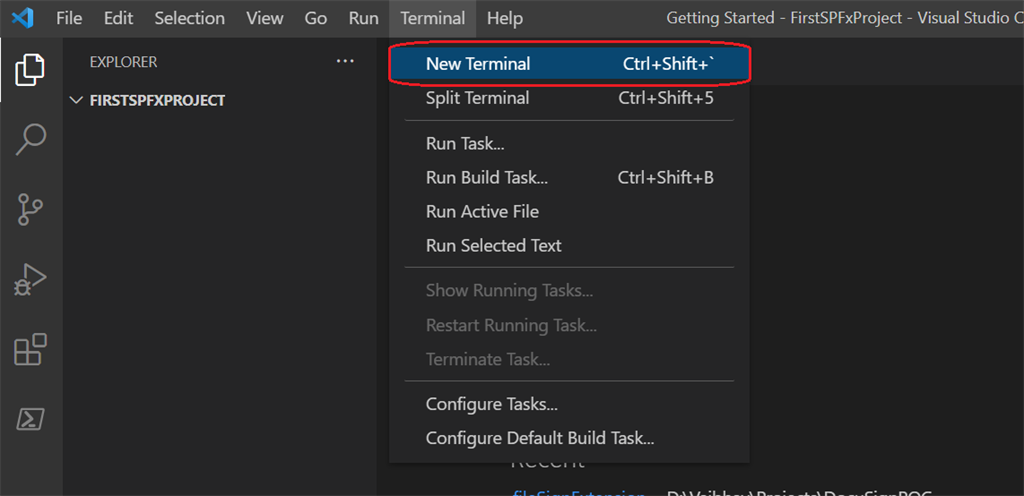


npm ls -g yoto see where it's installed.